
Often in compositing, I will need to take one set of values and convert it to a different set of values. Say I have a linear image, with luminance values in a range from 0 – 4.589:
| Input: | Output: |
| 0 | 0 |
| 4.589 | 1 |
0.0 / 4.589 = 0
0.1 / 4.589 = .021
0.5 / 4.589 = .1
0.9 / 4.589 = .19
1.0 / 4.589 = .217

...
4.589 / 4.589 = 1
There are two problems with this solution. First, our perception of luminance is not at all linear. Here’s an image of a gradient where 0 is black, and 1 is white (a linear curve):
The second problem with this method is that it treats values greater than 1 as of equal weight as values below, but to our eyes anything at 1.0 or higher is simply white. We don’t want to crunch the values and lose all that valuable data, though, because you never know what we’ll need to do to the image down the pipeline. So what we need is a better curve that more accurately represents how we visually see the range of luminance values in the image.
With a little bit of experimentation (and a lot of help from OSX’s Grapher application) I was able to come up with some mathematical equations creating different kinds of curves:
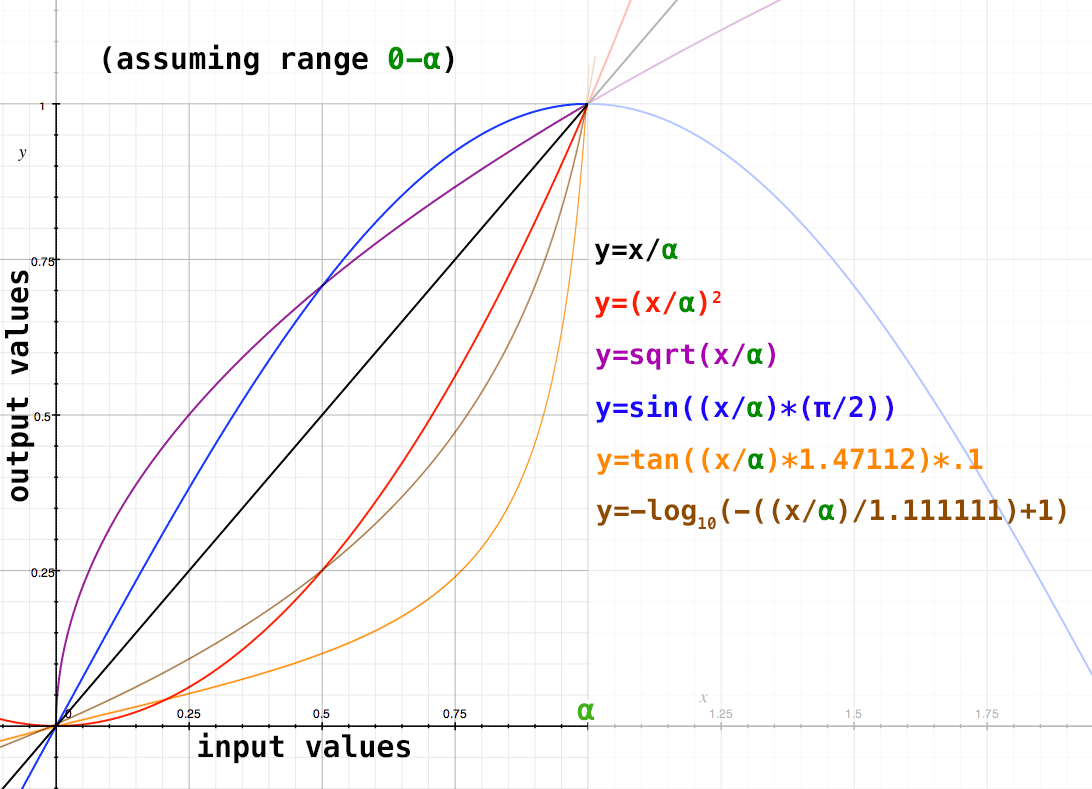
where the x-axis is your input values, and the y-axis is your ouput values (here 0-1)
On this chart, if we use our shorthand [ .5 linear luminance == .18 perceived luminance ] we can see that the visual perception curve lies somewhere around the square root curve. Before we plug in our values, though, we’ll need to eliminate (or correct) any values above one (temporarily, of course) with a simple if statement:
if (inputLuma >= 1 ):
	outputLuma = 1
else:
	outputLuma = inputLuma
Now, we plug in our new range (from 0-1) and convert it back to 0-1 using a different interpolation that more accurately represents human perception (here, our square root curve). In this case, since the top range value [α in the above graph] of the input is 1, you could eliminate the (x/α) elements.
sqrt(0.00) = 0.0
sqrt(0.18) = 0.42
sqrt(0.25) = 0.5
sqrt(0.50) = 0.70
sqrt(0.75) = 0.86
sqrt(1.00) = 1.0
Now we have a range of values, from 0-1, weighted appropriately based upon perceived luminance (more values in the darker end, fewer in the lighter end).

